Excuse the format of the post, I just cut and pasted all the posts I made from the 501st Redback Garrison Website.
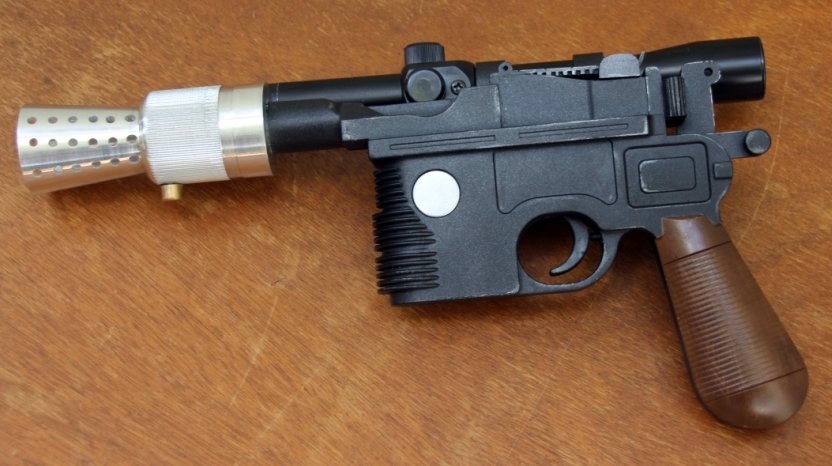
Hot on the heels of Buzzard :hehehe: I too have begun a Rubies DL-44 mod. A request job as a matter of fact for NQdude.
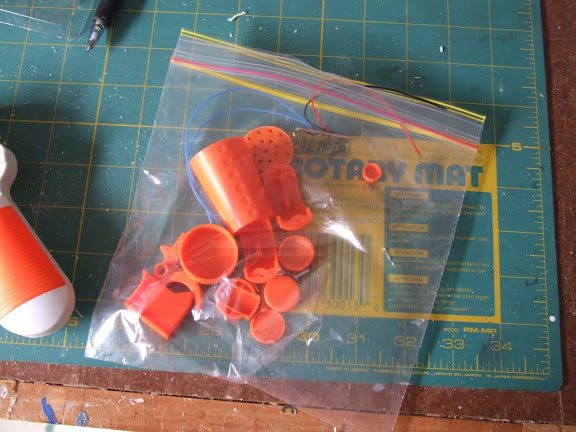
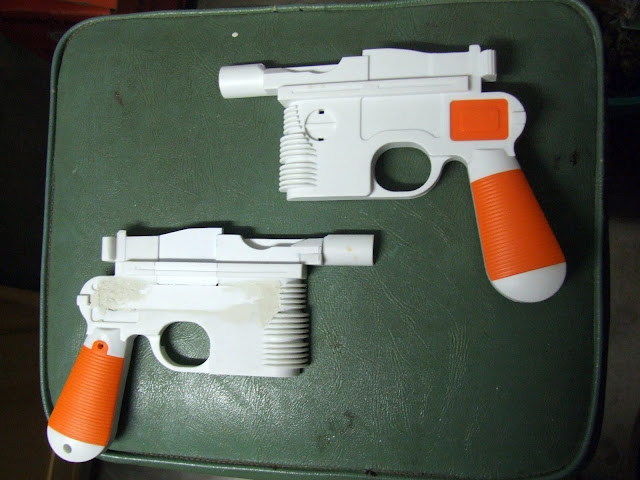
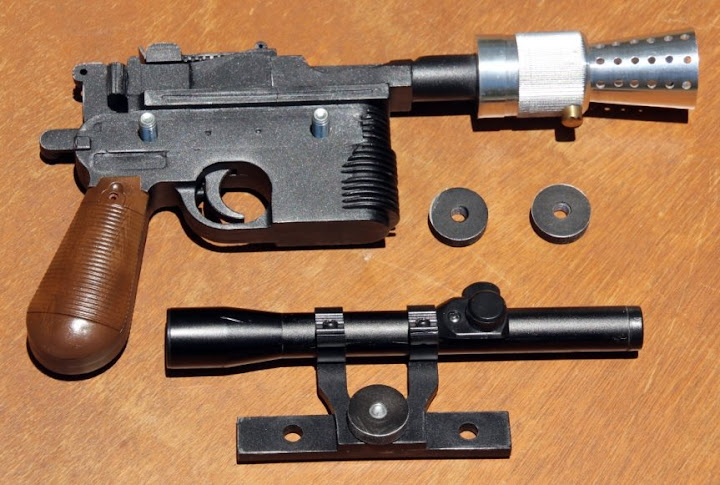
I began by breaking down the blaster...
![]()
Don't worry Anthony, the sound system will be going back in :)
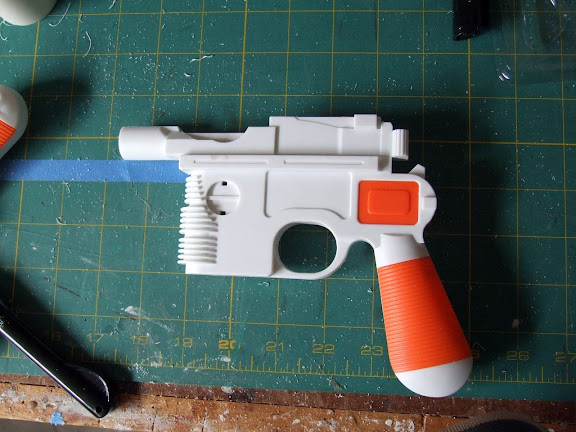
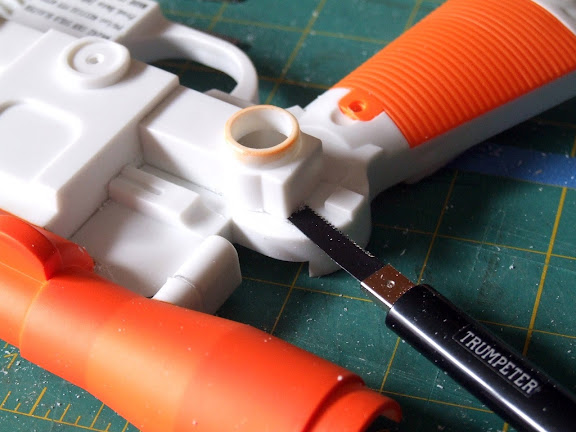
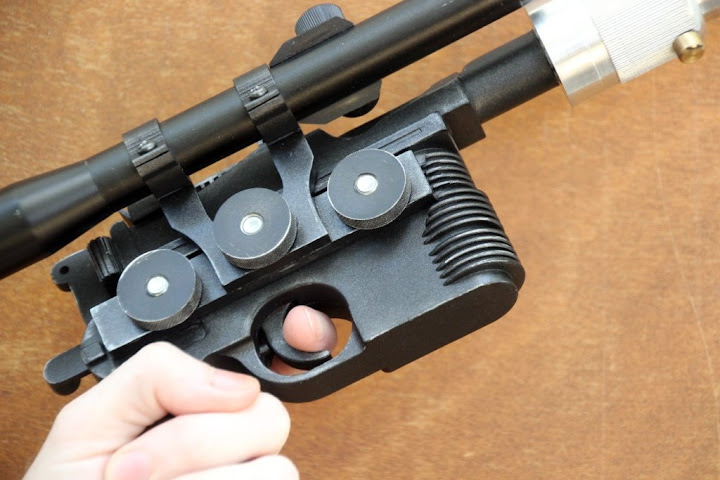
Next was the obvious step of removing the scope which is joined all the way along the blaster...how lame.
![]()
![]()
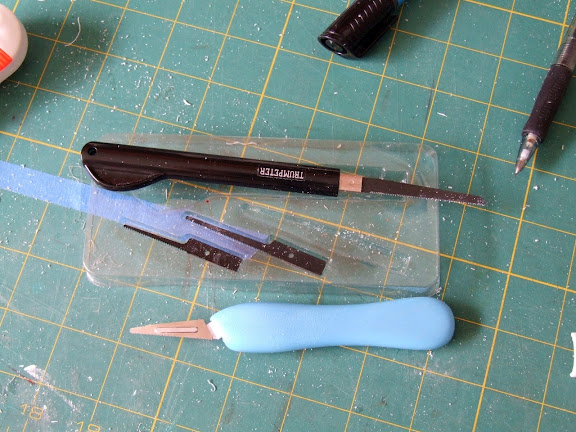
The difficult part was removing the bracket. I had thought of using the dremel but it can be a bit aggressive. So I used my model saw and photo-etched blades to precisely cut out what I wanted.
![]()
![]()
Now the next step is trying to make the blaster look like the original gun it was based on...the German Mauser C96 pistol. This will take some careful planning and a lot of work...
![]()
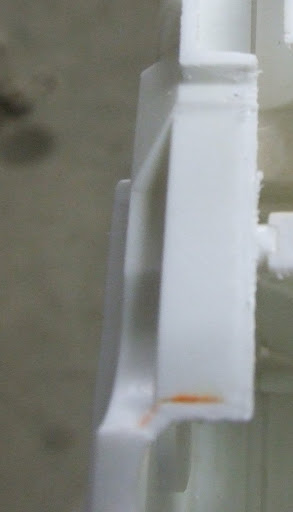
Buzzard and I got chatting about our mods and we both hit the same problem while rebuilding the top of the Mauser...There is a curved piece that sits mid-section between the sights and the barrel and should be on either side.
![]()
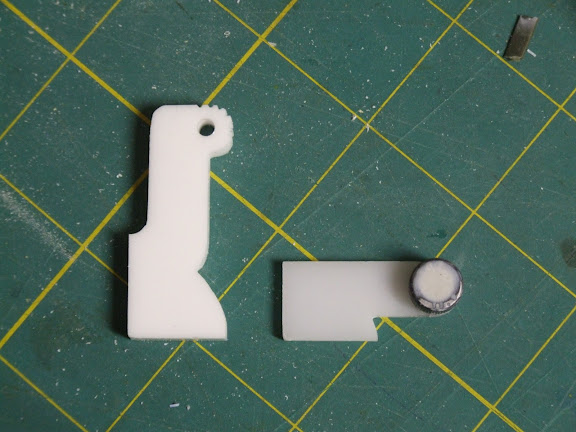
So while I was trying to figure this out, I turned my attention to the housing for the hammer that I will rebuild too. I started by cutting it wider as a safety mechanism also needs to be installed.
![]()
Now the real point here...is don't throw away anything. Why, because the curved bits that I cut out, fit exactly to the profile of the littel curved bit I mentioned earlier...eureka!!!
![]()
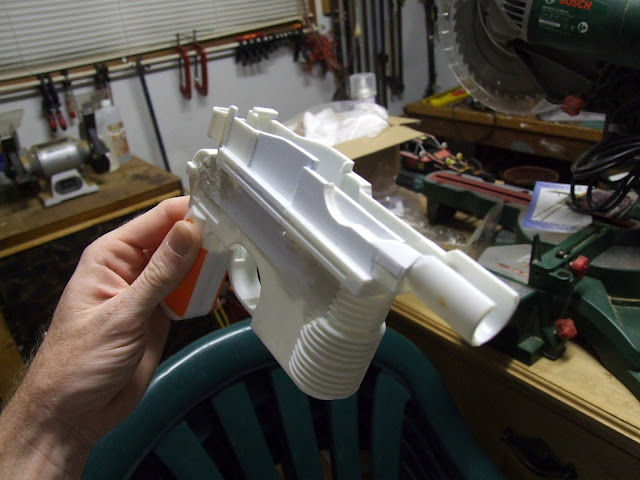
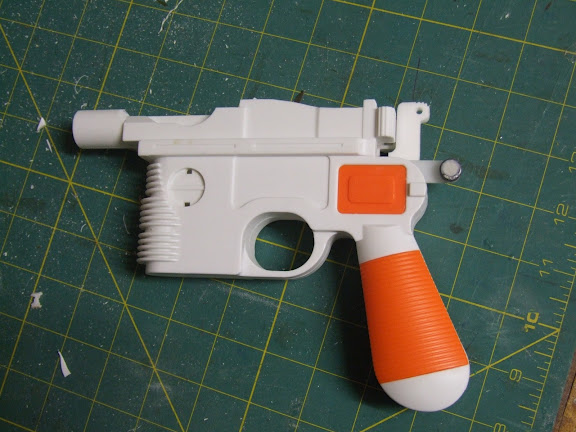
With a little trimming and shaving here and there, the two curved pieces follow nicely and the with the usuall filling and sanding, it will look identical in no time. As you can see, I have also cut away more of the top section to be rebuilt as this will be a lot easier.
More details and modding to come...
Went on a work trip over the last couple of days and had a quiet night to myself so on with the DL-44. Managed to complete the 'scope' side of the blaster so now I have two identical sides. Will now move onto the hammer and safety housing.
![]()
![]()
Slowly getting there NQDude :doppeldaumen1:
While I still figure out how to make a bracket for the scope and a housing to take the machined muzzle flash supressor, I knocked up the hammer and safety latch.
![]()
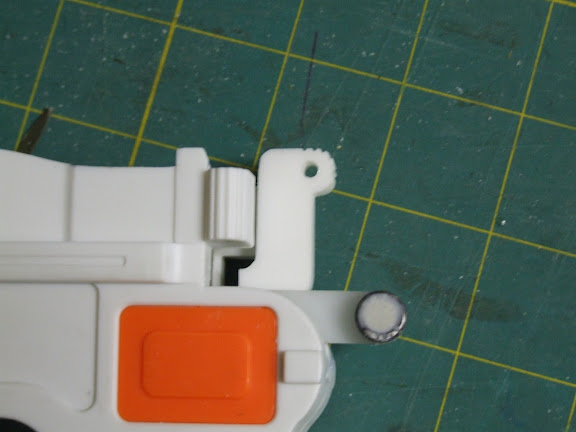
Here it is dry fitted...
![]()
![]()
Any guesses what the following might be for...?
![]()
Finally I have something to report...made up a set of sights...
![]()
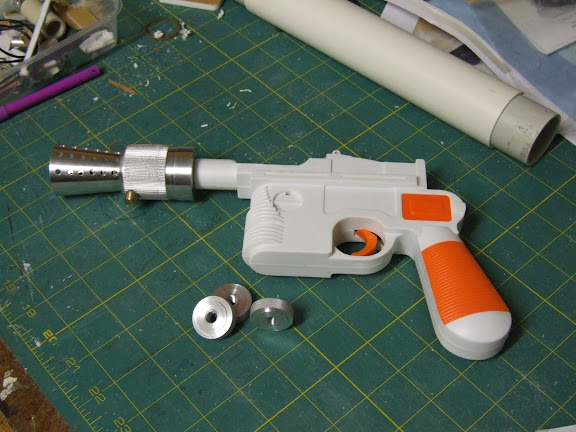
But more exciting is the flash surpressor and knurled nuts I picked up today.
![]()
![]()
I am a little disappointed as the surpressor is a little large for my liking. Lesson learnt from this...make the time to do up details drawings. I gave the old plastic end to my mate and just said "Here, duplicate this". Oh well...it still looks cool and feels nicely waited. More to come...
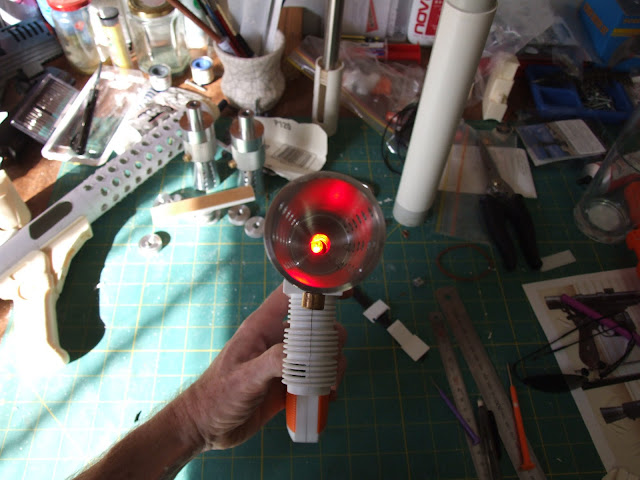
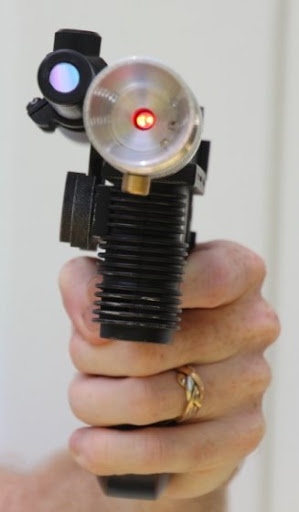
Okay, I've wired up the red LED for the barrell. For me, the hard part was positioning the micro switch just behind the trigger. But I'm pretty happy with the result.
![]()
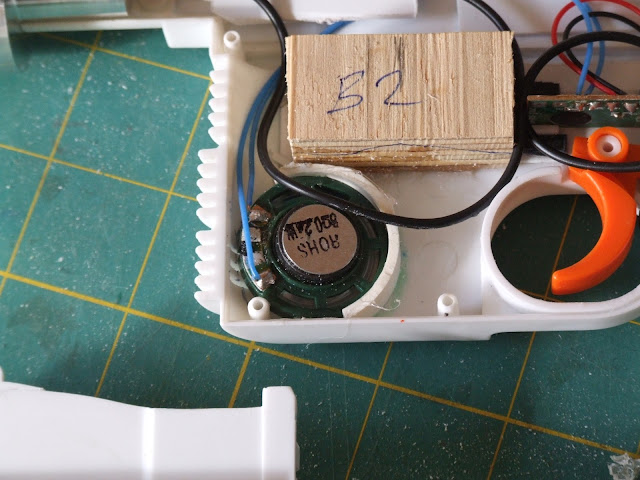
You'll see that I also had to reposition the speaker due to the new AWESOME flash suppressor which now houses the LED.
![]()
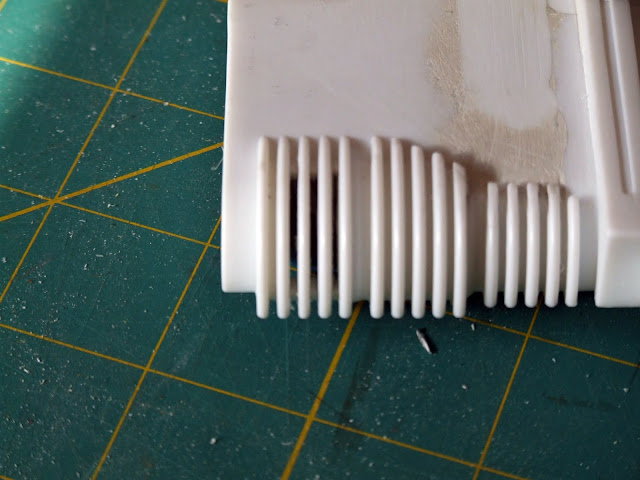
And I did have to cut some slots to allow the sound effect(which could be better), to escape from it's new home...
![]()
So with the wiring complete, I plan to fill all empty spaces with reshaped lead sinkers to add to the feel of a real blaster...as Boris The Russian said "Nothing says reliability more than weight. And if it does not shoot, you can always throw it at them."
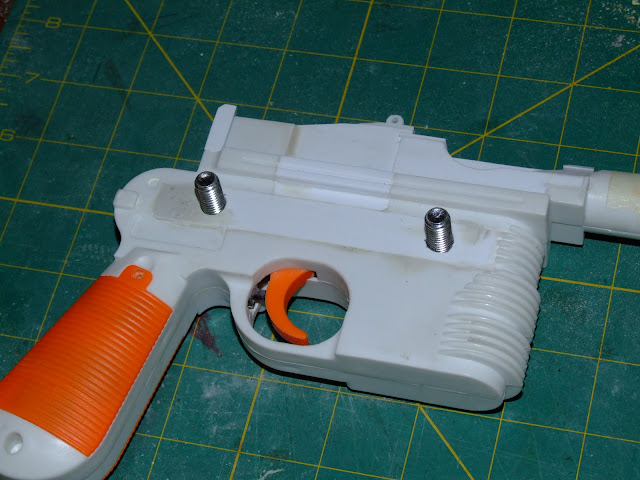
The two wooden blocks you see are for the bolts that will hold the scope mounting bracket.
![]()
PEW PEW PEW!!!
![]()
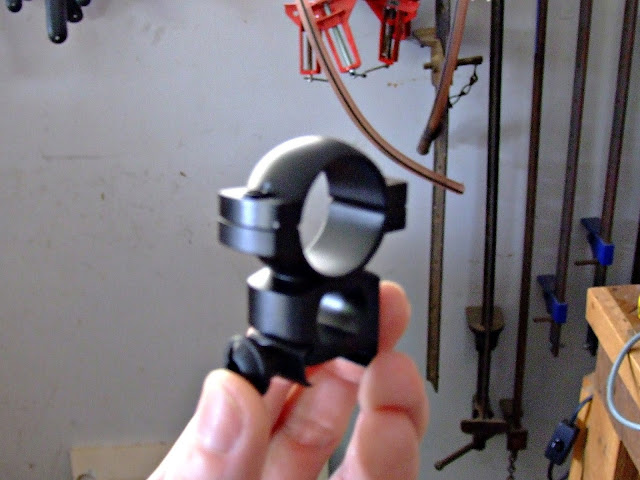
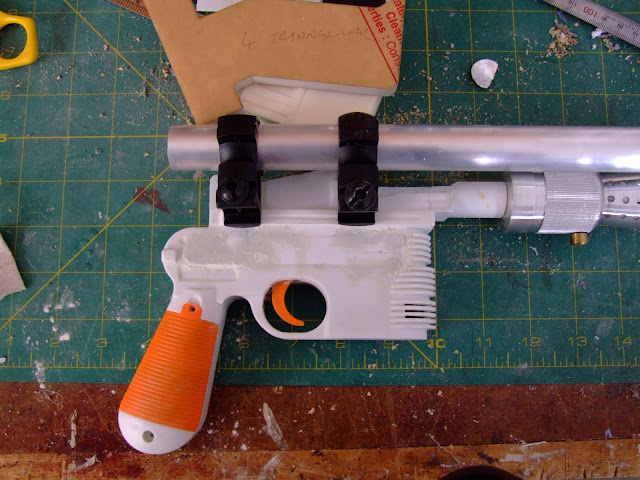
Now working on the scope and side mounted bracket. Started looking at scope brackets that look identical to the original...
![]()
But they all look to chunky and big.
![]()
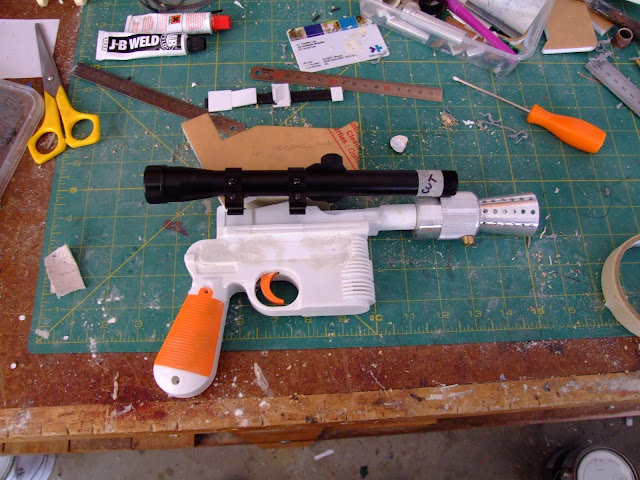
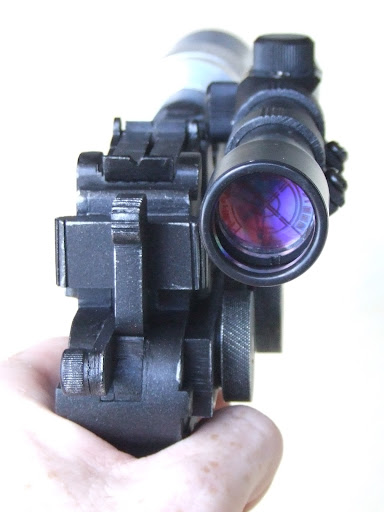
So I've gone with the smaller .22 scope as it looks better and will hurry along this build (cheap as chips too)...
![]()
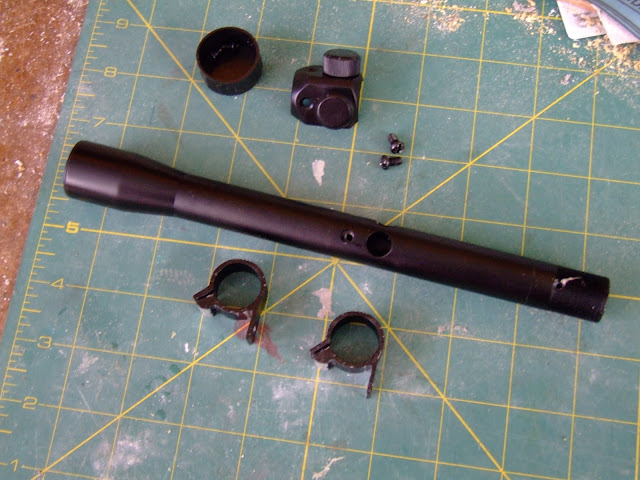
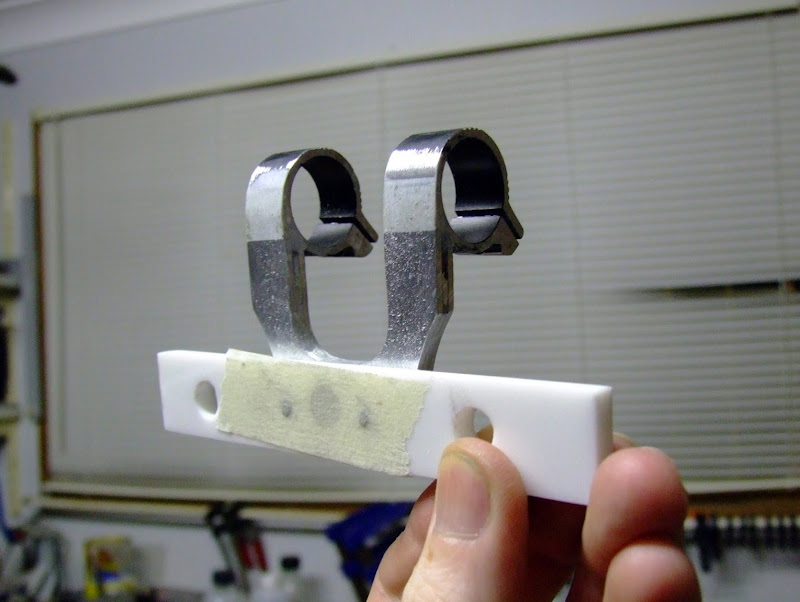
I've modified the brackets so they can be JB welded to the aluminium bracket I'll make.
![]()
![]()
But before any of this can be attached, I've attached bolts to take the "knurled nuts" for the mounting bracket bar.
![]()
![]()
The bar is made out of left over acrylic. Not much point in spending too much time trying to make a bar for it. You won't know the difference once its painted.
Next I'll be fashioning the bracket...to be continued...
Sweet!!! I got the scope mounting bracket just how I wanted it. I'd like to thank my new friends Kneadit and JB Weld. Without their help this wouldn't be possible...well for me and my limited workshop anyway :hehehe:
I cut the original scope brackets and mounted them between two pieces of aluminium sheeting using JB Weld and then cut and filed into shape flling some gaps with Kneadit...
![]()
![]()
![]()
From there I mounted it to the blaster with the scope to see how it looks. I also cut the scope to the correct length...
![]()
It's feeling nice and heavy...just like a real blaster...cause you know, they do exsist right?
![]()
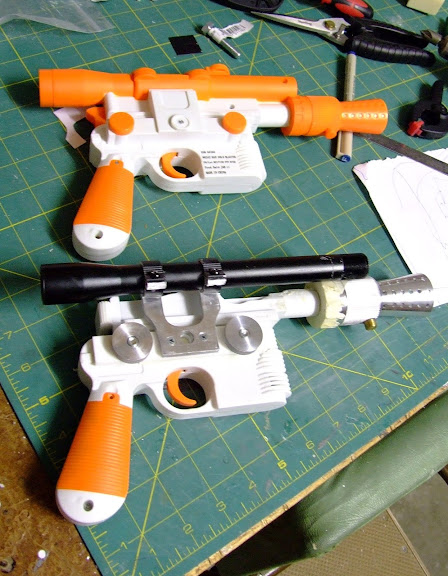
And I just thought I'd throw in a comparison shot along the way...
![]()
To be continued...
Don't you love it when things....just work out by sheer dumb luck. I was thinking how I will finish the end of the scope once I shorten it to the correct length. In the picture below you can see little orange buttons on the original scope mounts...
![]()
Well this little button is the exact same diameter as the tube of the scope...sweet!! It'll be painted like the rest of the blaster.
![]()
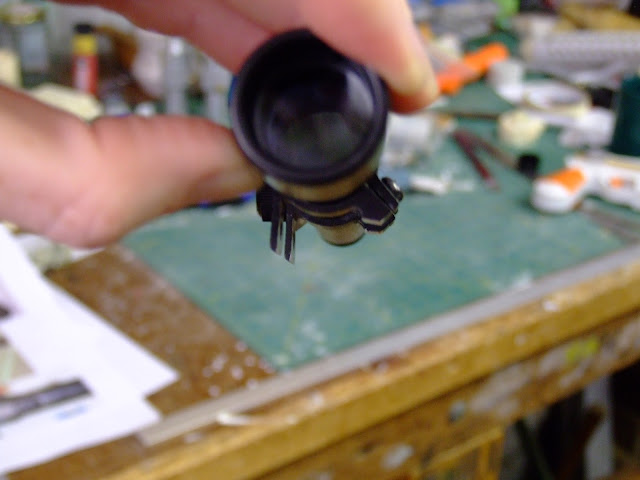
I'll be putting a small holo lens in the front and a standard size holo lens I made for the E-11 scopes...yes! This too is the exact inside diameter of the bell at the end of the scope...double sweet!
![]()
As an added bonus, the original lens of the scope can be put back in to help protect the 'Holo lens".
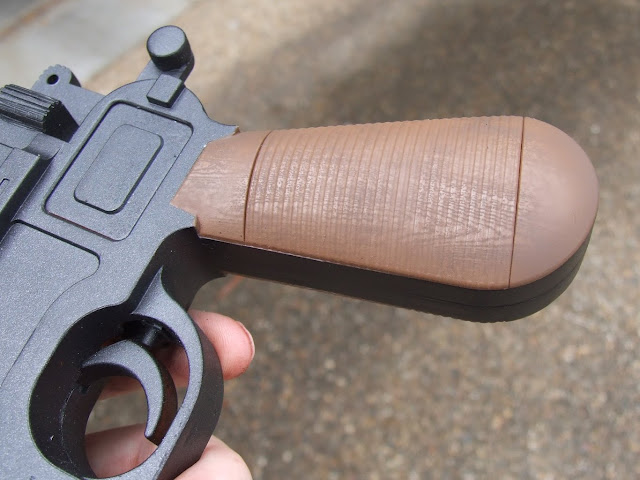
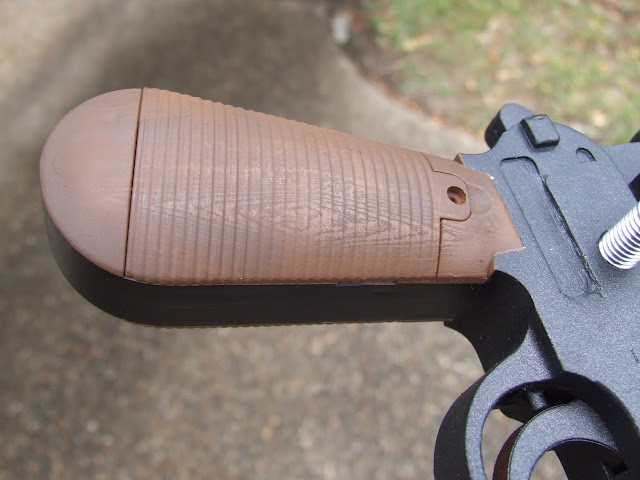
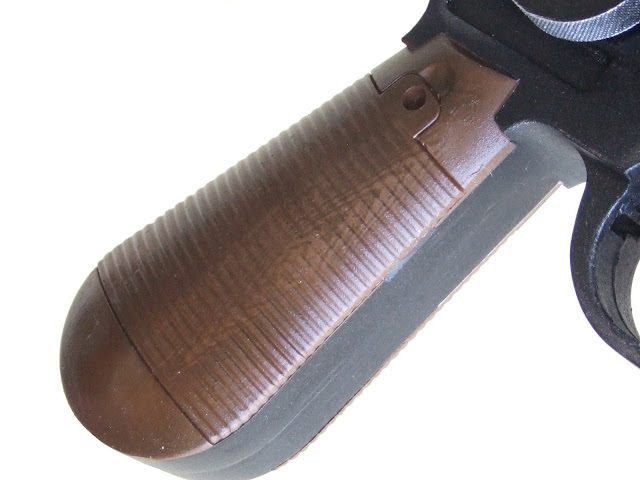
On the home stretch now...painted a subtle woodgrain finish on the handle today and now all that is left is a little bit of weathering and the final protective coat....I've really enjoyed this build I must say!!
![]()
![]()
The final post is next...
And I just crossed the finish line...phew!!!
![]()
![]()
![]()
![]()
![]()
![]()
![]()
![]()
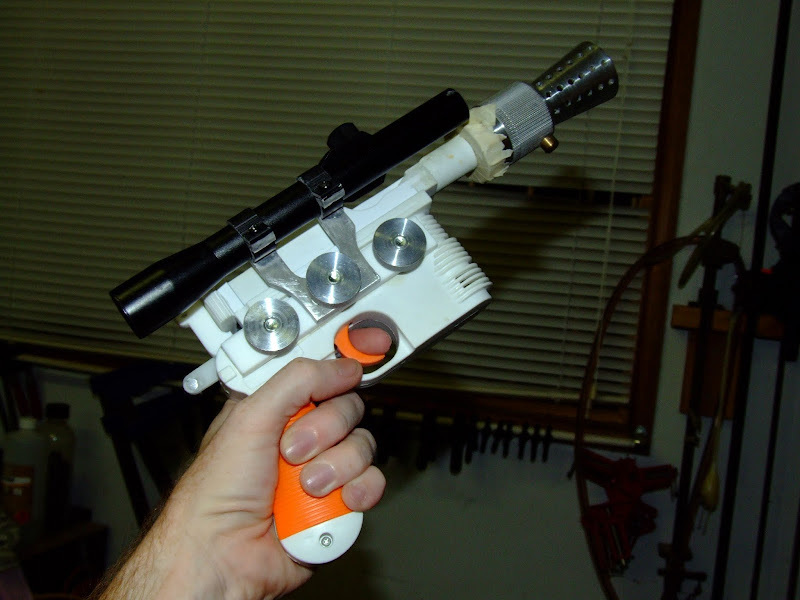
Oh and it handles well...
![]()
![]()
Next on the list...
Baytroopers E-11
Ashbash's Wester 35's
Hot on the heels of Buzzard :hehehe: I too have begun a Rubies DL-44 mod. A request job as a matter of fact for NQdude.
I began by breaking down the blaster...
Don't worry Anthony, the sound system will be going back in :)
Next was the obvious step of removing the scope which is joined all the way along the blaster...how lame.
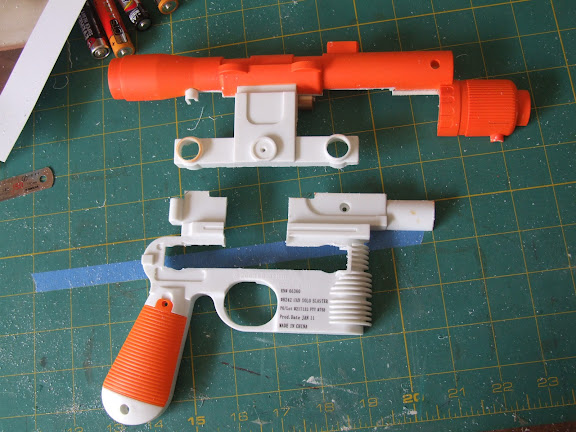
The difficult part was removing the bracket. I had thought of using the dremel but it can be a bit aggressive. So I used my model saw and photo-etched blades to precisely cut out what I wanted.
Now the next step is trying to make the blaster look like the original gun it was based on...the German Mauser C96 pistol. This will take some careful planning and a lot of work...

Buzzard and I got chatting about our mods and we both hit the same problem while rebuilding the top of the Mauser...There is a curved piece that sits mid-section between the sights and the barrel and should be on either side.
So while I was trying to figure this out, I turned my attention to the housing for the hammer that I will rebuild too. I started by cutting it wider as a safety mechanism also needs to be installed.
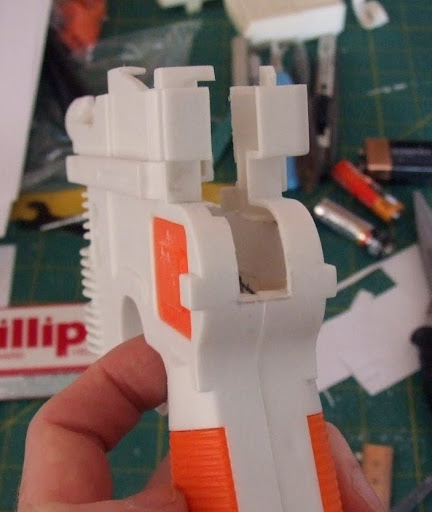
Now the real point here...is don't throw away anything. Why, because the curved bits that I cut out, fit exactly to the profile of the littel curved bit I mentioned earlier...eureka!!!

With a little trimming and shaving here and there, the two curved pieces follow nicely and the with the usuall filling and sanding, it will look identical in no time. As you can see, I have also cut away more of the top section to be rebuilt as this will be a lot easier.
More details and modding to come...
Went on a work trip over the last couple of days and had a quiet night to myself so on with the DL-44. Managed to complete the 'scope' side of the blaster so now I have two identical sides. Will now move onto the hammer and safety housing.
Slowly getting there NQDude :doppeldaumen1:
While I still figure out how to make a bracket for the scope and a housing to take the machined muzzle flash supressor, I knocked up the hammer and safety latch.
Here it is dry fitted...
Any guesses what the following might be for...?
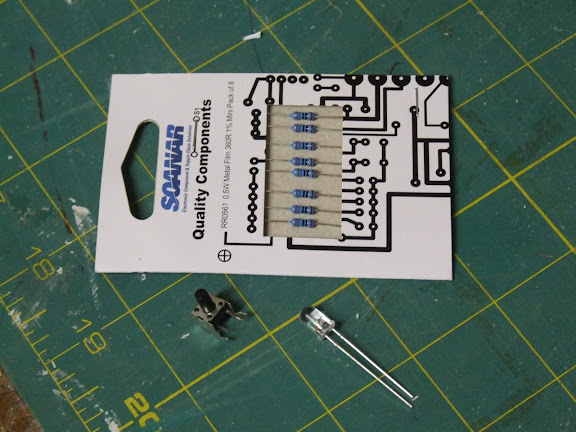
Finally I have something to report...made up a set of sights...

But more exciting is the flash surpressor and knurled nuts I picked up today.
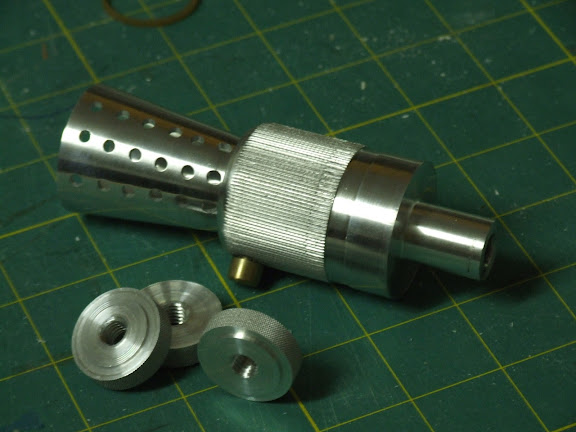
I am a little disappointed as the surpressor is a little large for my liking. Lesson learnt from this...make the time to do up details drawings. I gave the old plastic end to my mate and just said "Here, duplicate this". Oh well...it still looks cool and feels nicely waited. More to come...
Okay, I've wired up the red LED for the barrell. For me, the hard part was positioning the micro switch just behind the trigger. But I'm pretty happy with the result.
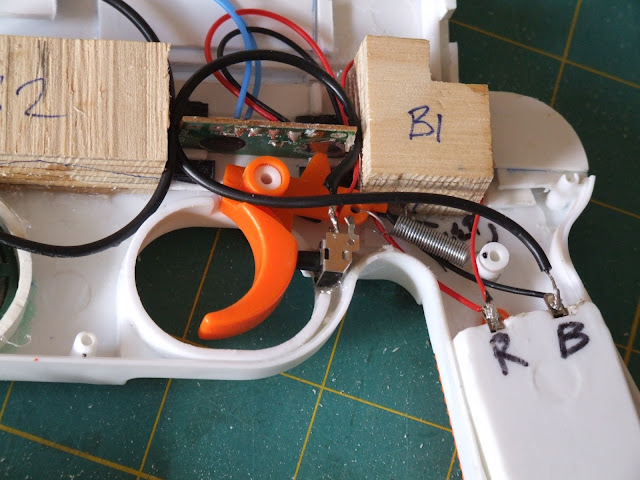
You'll see that I also had to reposition the speaker due to the new AWESOME flash suppressor which now houses the LED.
And I did have to cut some slots to allow the sound effect(which could be better), to escape from it's new home...
So with the wiring complete, I plan to fill all empty spaces with reshaped lead sinkers to add to the feel of a real blaster...as Boris The Russian said "Nothing says reliability more than weight. And if it does not shoot, you can always throw it at them."
The two wooden blocks you see are for the bolts that will hold the scope mounting bracket.

PEW PEW PEW!!!
Now working on the scope and side mounted bracket. Started looking at scope brackets that look identical to the original...
But they all look to chunky and big.
So I've gone with the smaller .22 scope as it looks better and will hurry along this build (cheap as chips too)...
I've modified the brackets so they can be JB welded to the aluminium bracket I'll make.
But before any of this can be attached, I've attached bolts to take the "knurled nuts" for the mounting bracket bar.
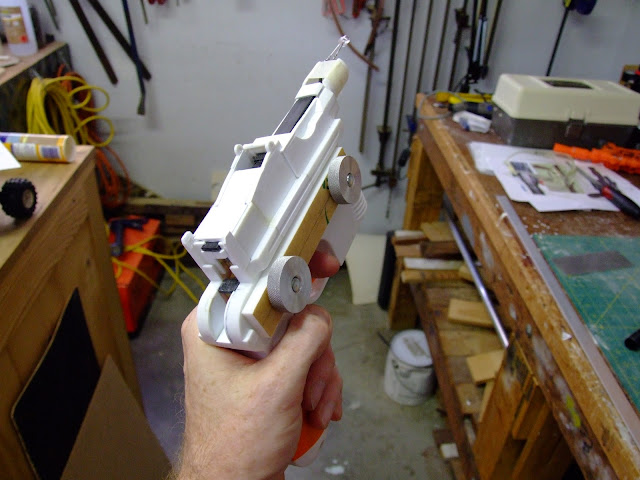
The bar is made out of left over acrylic. Not much point in spending too much time trying to make a bar for it. You won't know the difference once its painted.
Next I'll be fashioning the bracket...to be continued...
Sweet!!! I got the scope mounting bracket just how I wanted it. I'd like to thank my new friends Kneadit and JB Weld. Without their help this wouldn't be possible...well for me and my limited workshop anyway :hehehe:
I cut the original scope brackets and mounted them between two pieces of aluminium sheeting using JB Weld and then cut and filed into shape flling some gaps with Kneadit...

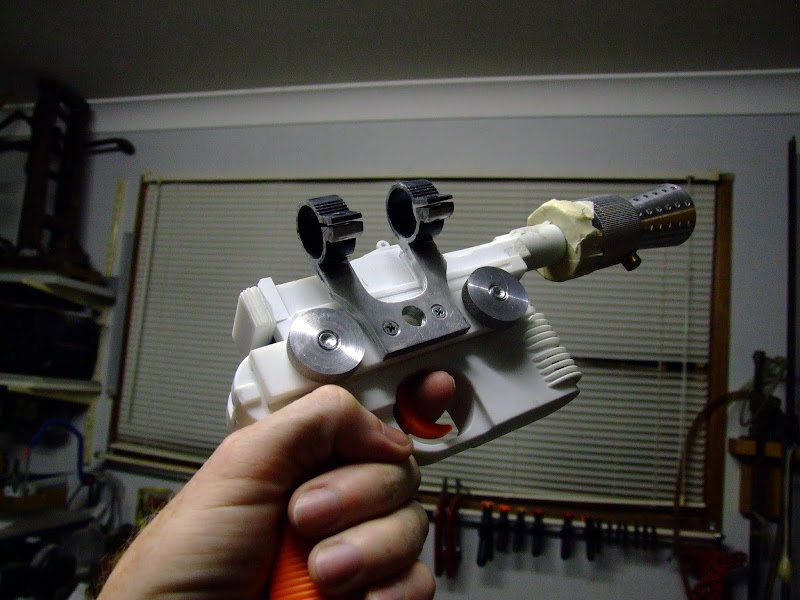
From there I mounted it to the blaster with the scope to see how it looks. I also cut the scope to the correct length...

It's feeling nice and heavy...just like a real blaster...cause you know, they do exsist right?
And I just thought I'd throw in a comparison shot along the way...
To be continued...
Don't you love it when things....just work out by sheer dumb luck. I was thinking how I will finish the end of the scope once I shorten it to the correct length. In the picture below you can see little orange buttons on the original scope mounts...

Well this little button is the exact same diameter as the tube of the scope...sweet!! It'll be painted like the rest of the blaster.

I'll be putting a small holo lens in the front and a standard size holo lens I made for the E-11 scopes...yes! This too is the exact inside diameter of the bell at the end of the scope...double sweet!

As an added bonus, the original lens of the scope can be put back in to help protect the 'Holo lens".
On the home stretch now...painted a subtle woodgrain finish on the handle today and now all that is left is a little bit of weathering and the final protective coat....I've really enjoyed this build I must say!!
The final post is next...
And I just crossed the finish line...phew!!!

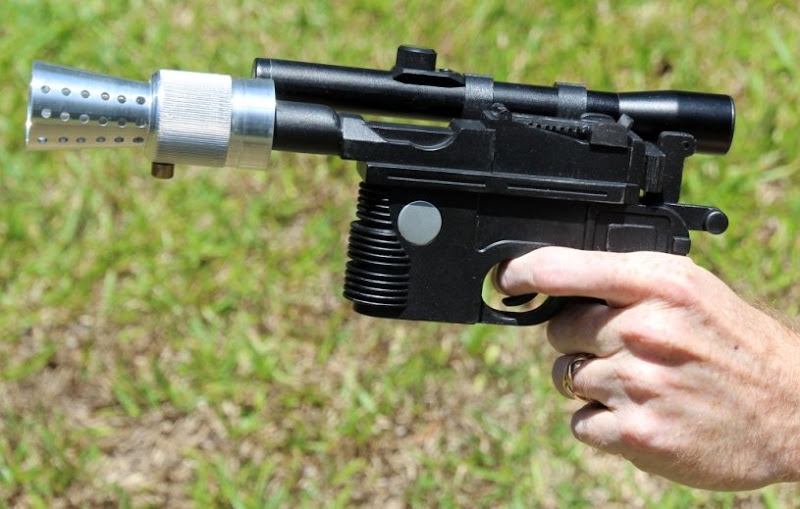
Oh and it handles well...


Next on the list...
Baytroopers E-11
Ashbash's Wester 35's