Embarrassing confession time: up until the last couple of months, I had never seen any of the Alien anthology start to finish. :blush Last summer Amazon had the anthology blu ray set on sale, so I picked it up. I finally got around to watching them all over the last couple of months. During my watching, I also started browsing pulse rifle threads here, and my interest was significantly piqued! Unfortunately, when I get stuck on a prop I get stuck on it. Naturally I had to have one of my own!
On a couple of recommendations, I stumbled on Spat Cave and his resin kit. I could have gotten the airsoft from Evike, but I'm more of a do-it-yourselfer. I opted for the $200 model with static LED counter (set at 95).
The kit:
This thing is beautiful! It arrived well packed, which was a slight concern when I saw that everything fit inside a medium USPS box. The pieces were wrapped in bubble wrap, so everything was unharmed!
With this kit you receive:
- upper shroud in two halves
- grenade launcher and pump handle in two halves
- barrel/vent assembly (solid piece*)
- mag well in two halves
- Thompson lower receiver with working trigger
- mag well front and back plate
- stock
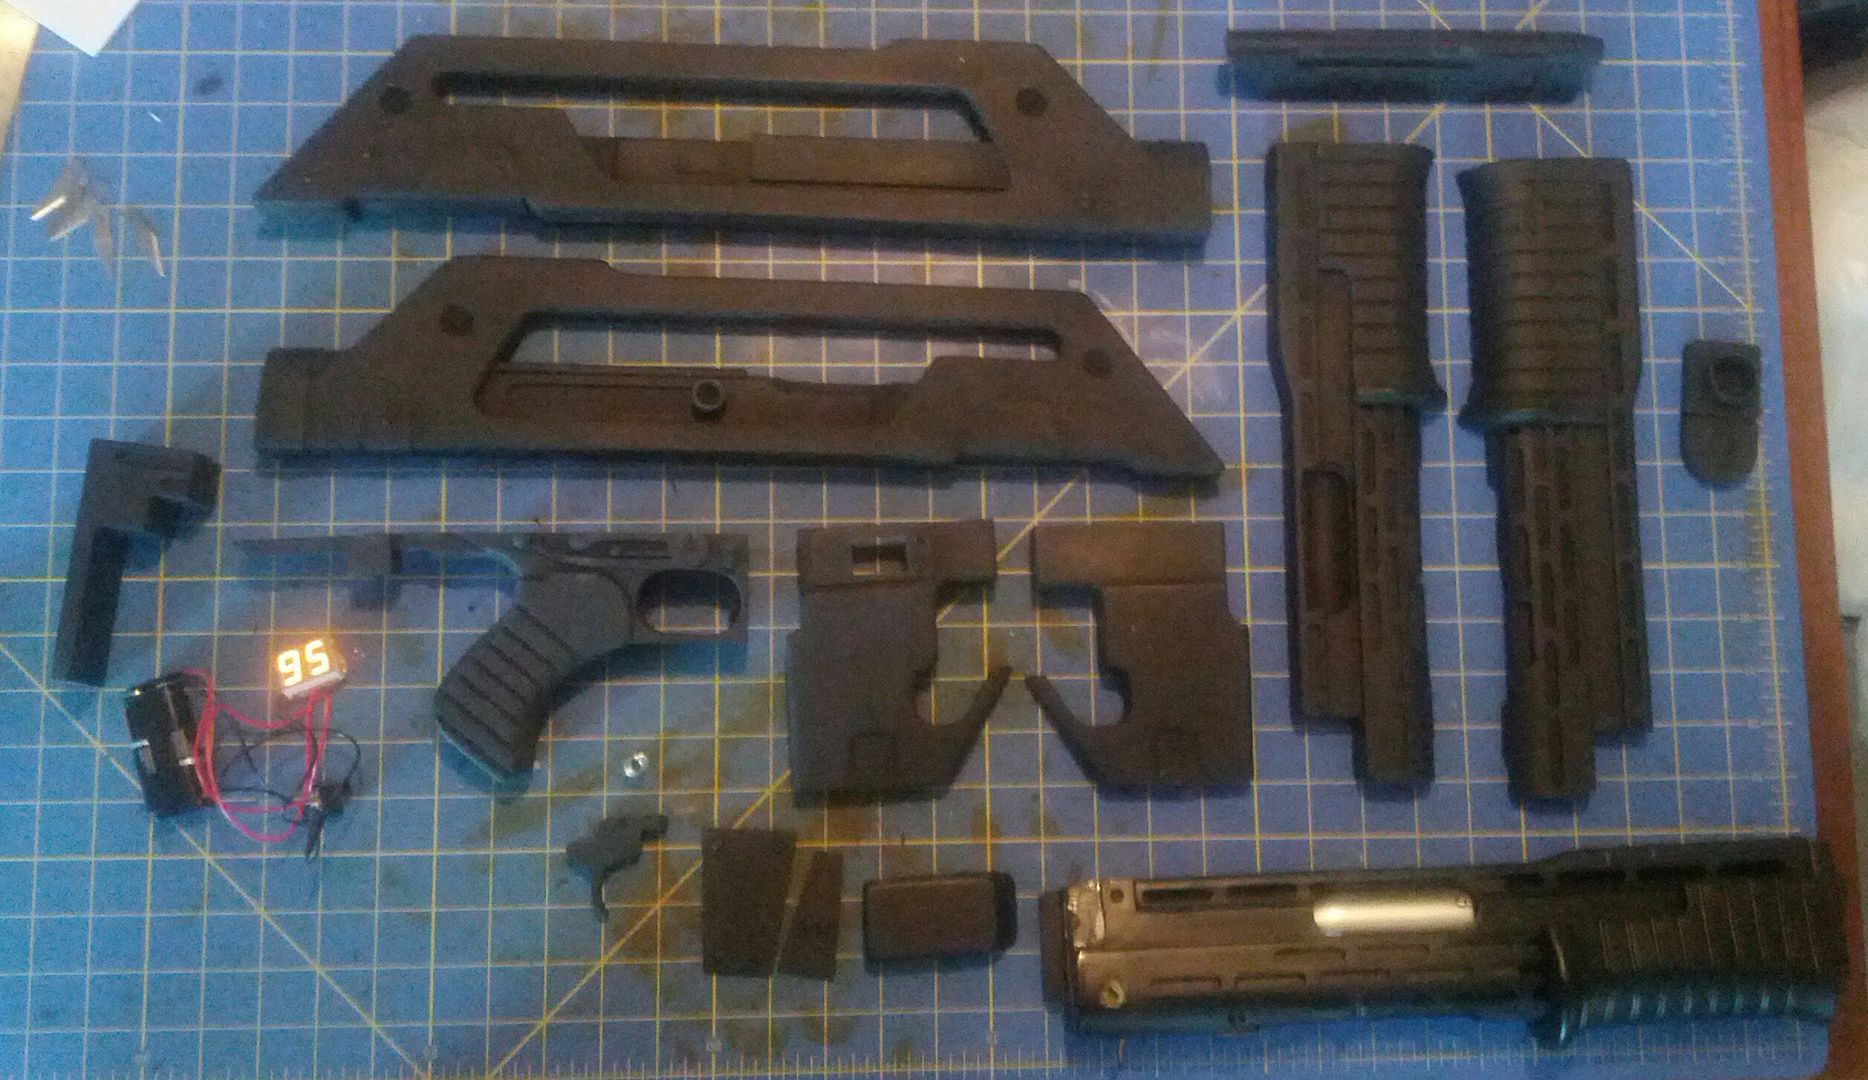
As luck would have it, I was also fortunate enough to pick up a resin grenade launcher from Matsuo, which has a working pump grip, shell litter, and trigger. Here is everything laid out as I received it
![]()
As I mentioned before, this kit is beautiful. Very little clean up work is necessary, and Spat does most of that clean up for you before sending it. All I needed to do was some light sanding on some edges to true everything up. Here is everything mocked up before I began just to test fit parts
![]()
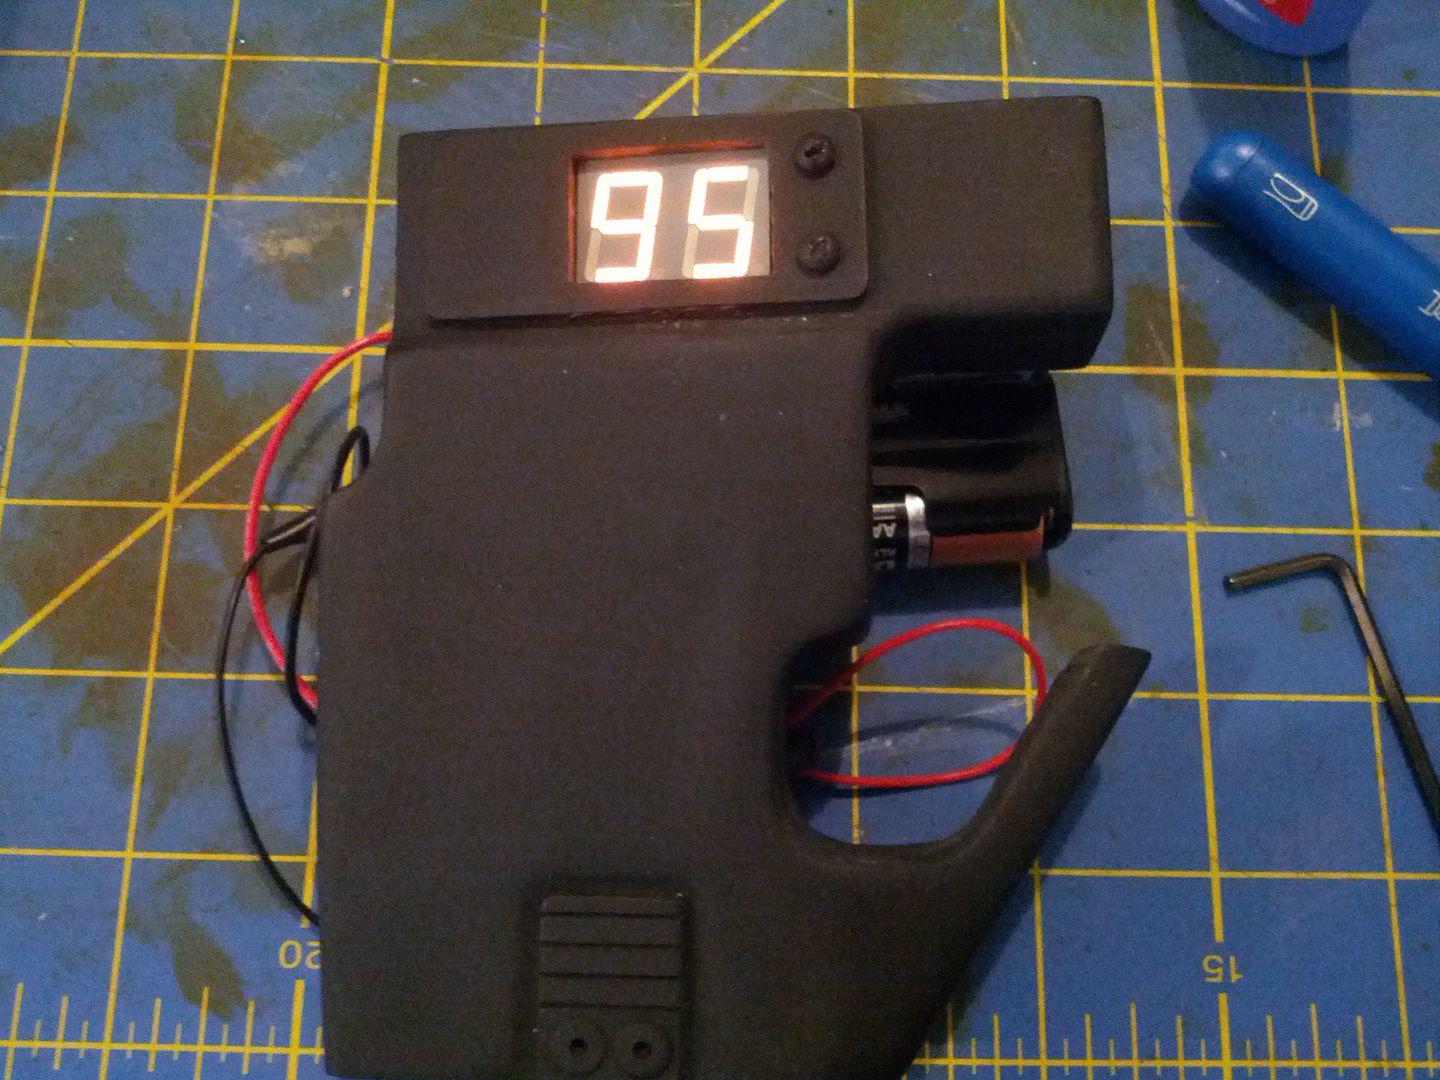
Close up of mag well with LED counter
![]()
![]()
Here is the Matsuo GL and the Spat GL for comparison
![]()
As you can see, the two are shaped quite differently. I knew going into it that I would need to do some heavy modifications to either the grenade launcher or the mag well to make this work. At first I wanted to hollow out the mag well so as not to do anything to the Matsuo GL. I realized however that this would be a lot more work, and would be harder to get everything to line up and fit correctly. The easier route was to cut down the GL to fit the mag well.
To accomplish this, I made a paper template using one half of the Spat GL and laid that over half of the Matsuo GL and traced my cut lines. I used a hacksaw blade to make the cuts on each half of the GL. Once everything was cut I sanded everything down to fit flush with the mag well. I also had to carve out a portion of the mag well to allow the pump handle to slide open completely, and to allow the GL trigger to move freely. Here is the finished GL with the mag well.
![]()
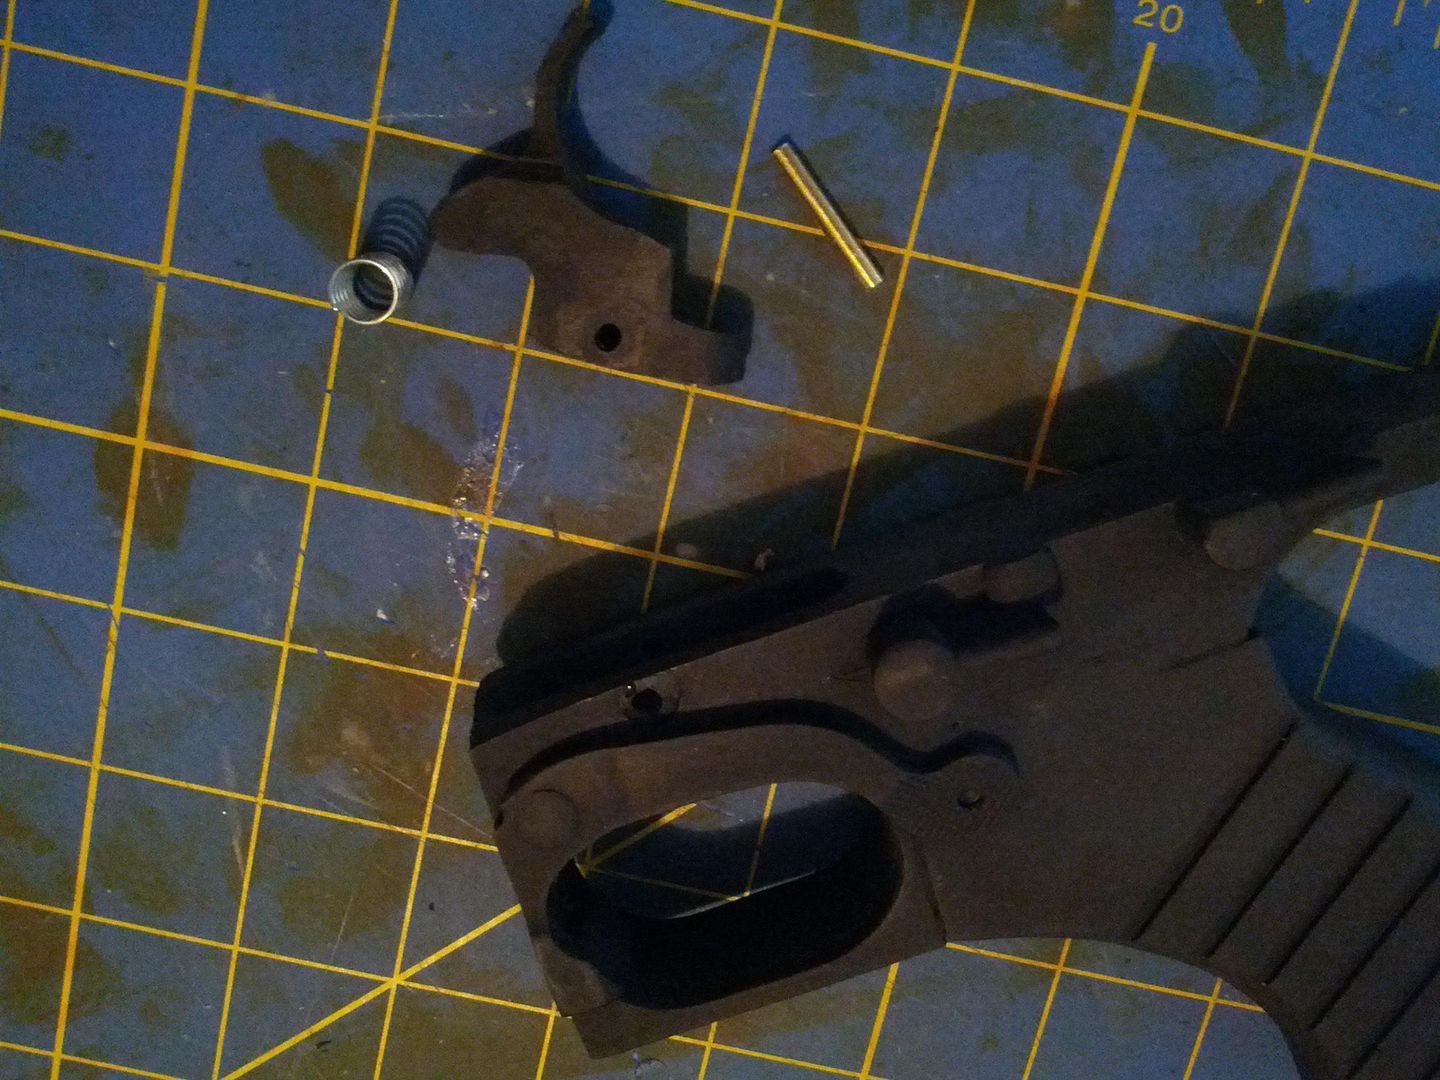
Everything else came together rather easily after that. Just glued the shroud halves together, then the mag well halves together. The Thompson receiver came equipped with a working trigger and spring. I simply had to drill a 1/8" hole through each side of the receiver and through the trigger. I cut a small piece of 1/8" rod that fed through the assembly to keep the trigger in place. I left the rod slightly shorter so I could fill each side with putty to cover it up. I then hot glued the spring to the top of the trigger assemby.
![]()
![]()
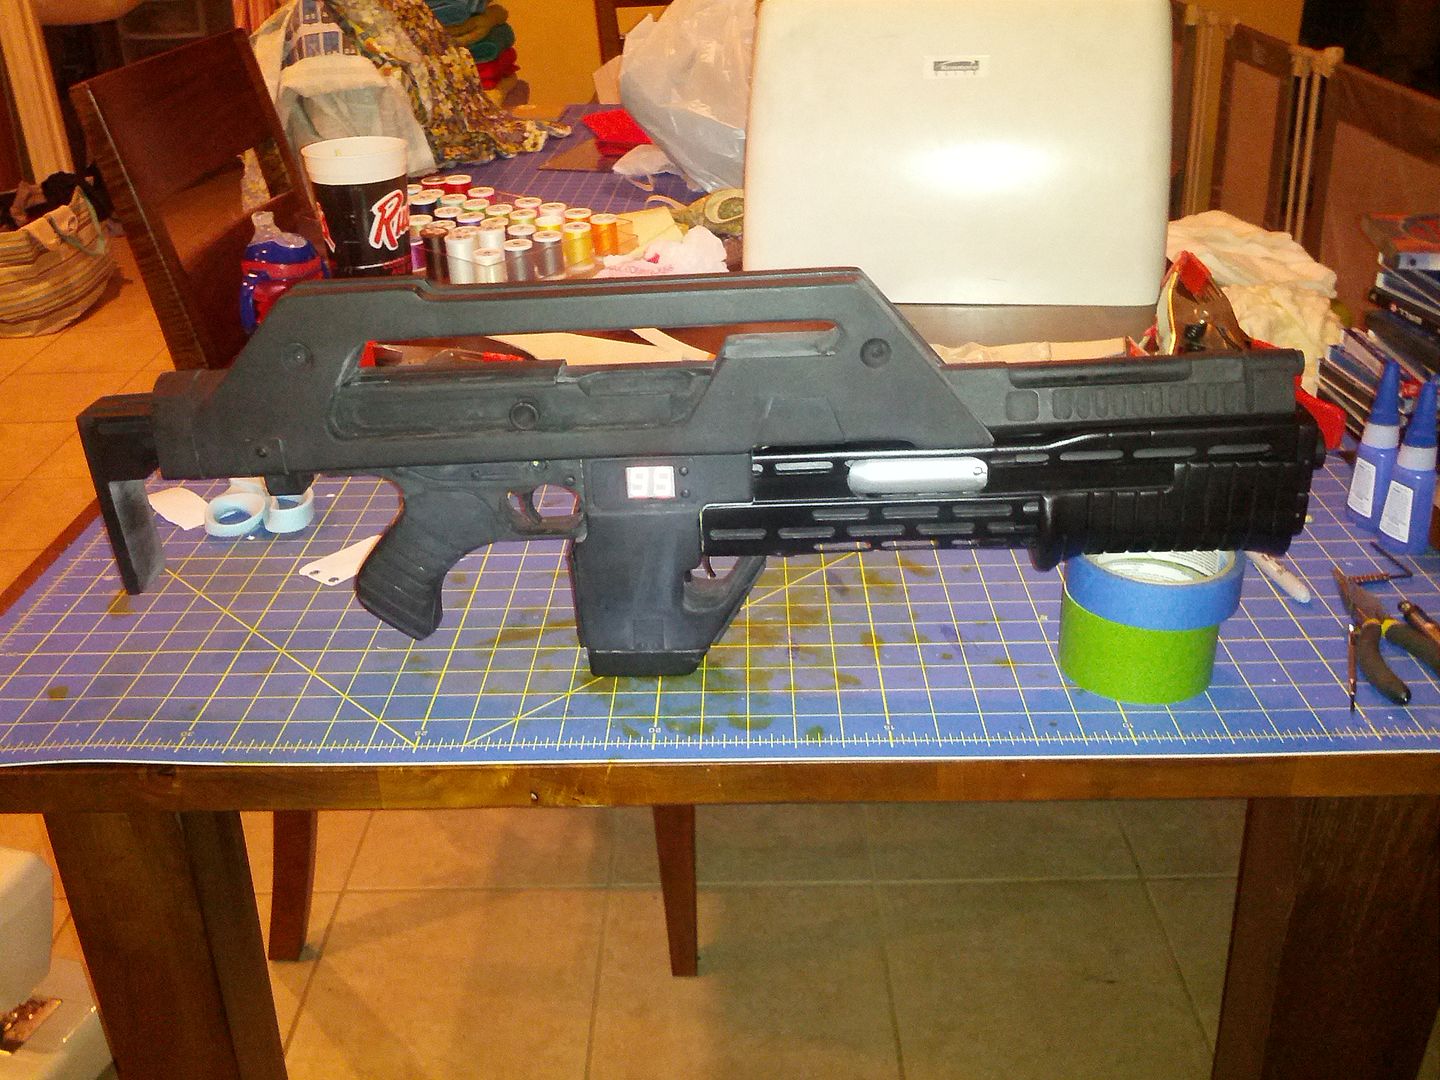
Now I could start assembling the pieces together. The receiver and mag well were glued together, then that assembly was glued to the shrouds. Next, the GL was glued, followed by the stock. The front and back mag well plates were the last pieces I glued on. For the magazine cap, I drilled and recessed magnets so I could take it on and off easily, since that is where the battery pack is kept for the LED.
No flash
![]()
With flash
![]()
I'll take some proper pictures in the next couple of days.
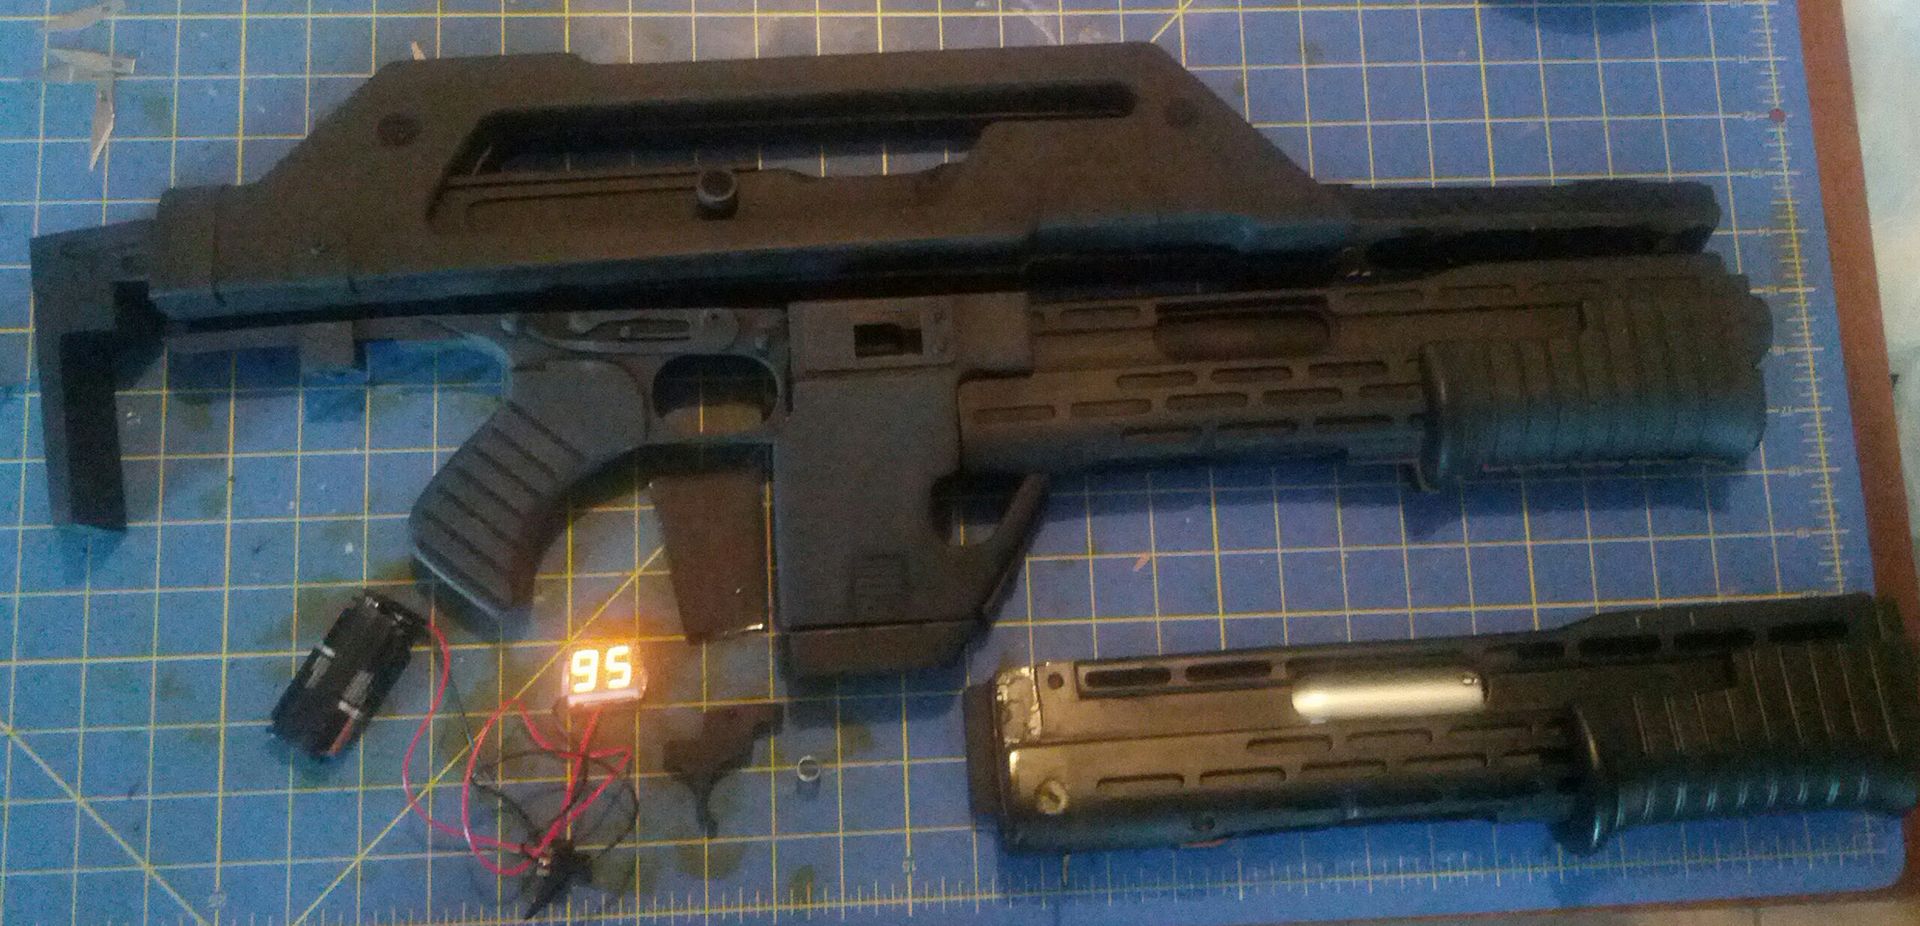
Here is everything all put together with the exception of the barrel/vent assembly*. For the picture, it is just sitting on top. I'm not too keen on having the assembly a solid piece, and I don't think drilling out the vents will be enough for me. I may end scratch building that part.
All I need to do is some minor seam clean up and puttying, then a little bit of sanding before I can paint! Should have everything all done next week :thumbsup
On a couple of recommendations, I stumbled on Spat Cave and his resin kit. I could have gotten the airsoft from Evike, but I'm more of a do-it-yourselfer. I opted for the $200 model with static LED counter (set at 95).
The kit:
This thing is beautiful! It arrived well packed, which was a slight concern when I saw that everything fit inside a medium USPS box. The pieces were wrapped in bubble wrap, so everything was unharmed!
With this kit you receive:
- upper shroud in two halves
- grenade launcher and pump handle in two halves
- barrel/vent assembly (solid piece*)
- mag well in two halves
- Thompson lower receiver with working trigger
- mag well front and back plate
- stock
As luck would have it, I was also fortunate enough to pick up a resin grenade launcher from Matsuo, which has a working pump grip, shell litter, and trigger. Here is everything laid out as I received it
As I mentioned before, this kit is beautiful. Very little clean up work is necessary, and Spat does most of that clean up for you before sending it. All I needed to do was some light sanding on some edges to true everything up. Here is everything mocked up before I began just to test fit parts
Close up of mag well with LED counter

Here is the Matsuo GL and the Spat GL for comparison
As you can see, the two are shaped quite differently. I knew going into it that I would need to do some heavy modifications to either the grenade launcher or the mag well to make this work. At first I wanted to hollow out the mag well so as not to do anything to the Matsuo GL. I realized however that this would be a lot more work, and would be harder to get everything to line up and fit correctly. The easier route was to cut down the GL to fit the mag well.
To accomplish this, I made a paper template using one half of the Spat GL and laid that over half of the Matsuo GL and traced my cut lines. I used a hacksaw blade to make the cuts on each half of the GL. Once everything was cut I sanded everything down to fit flush with the mag well. I also had to carve out a portion of the mag well to allow the pump handle to slide open completely, and to allow the GL trigger to move freely. Here is the finished GL with the mag well.

Everything else came together rather easily after that. Just glued the shroud halves together, then the mag well halves together. The Thompson receiver came equipped with a working trigger and spring. I simply had to drill a 1/8" hole through each side of the receiver and through the trigger. I cut a small piece of 1/8" rod that fed through the assembly to keep the trigger in place. I left the rod slightly shorter so I could fill each side with putty to cover it up. I then hot glued the spring to the top of the trigger assemby.
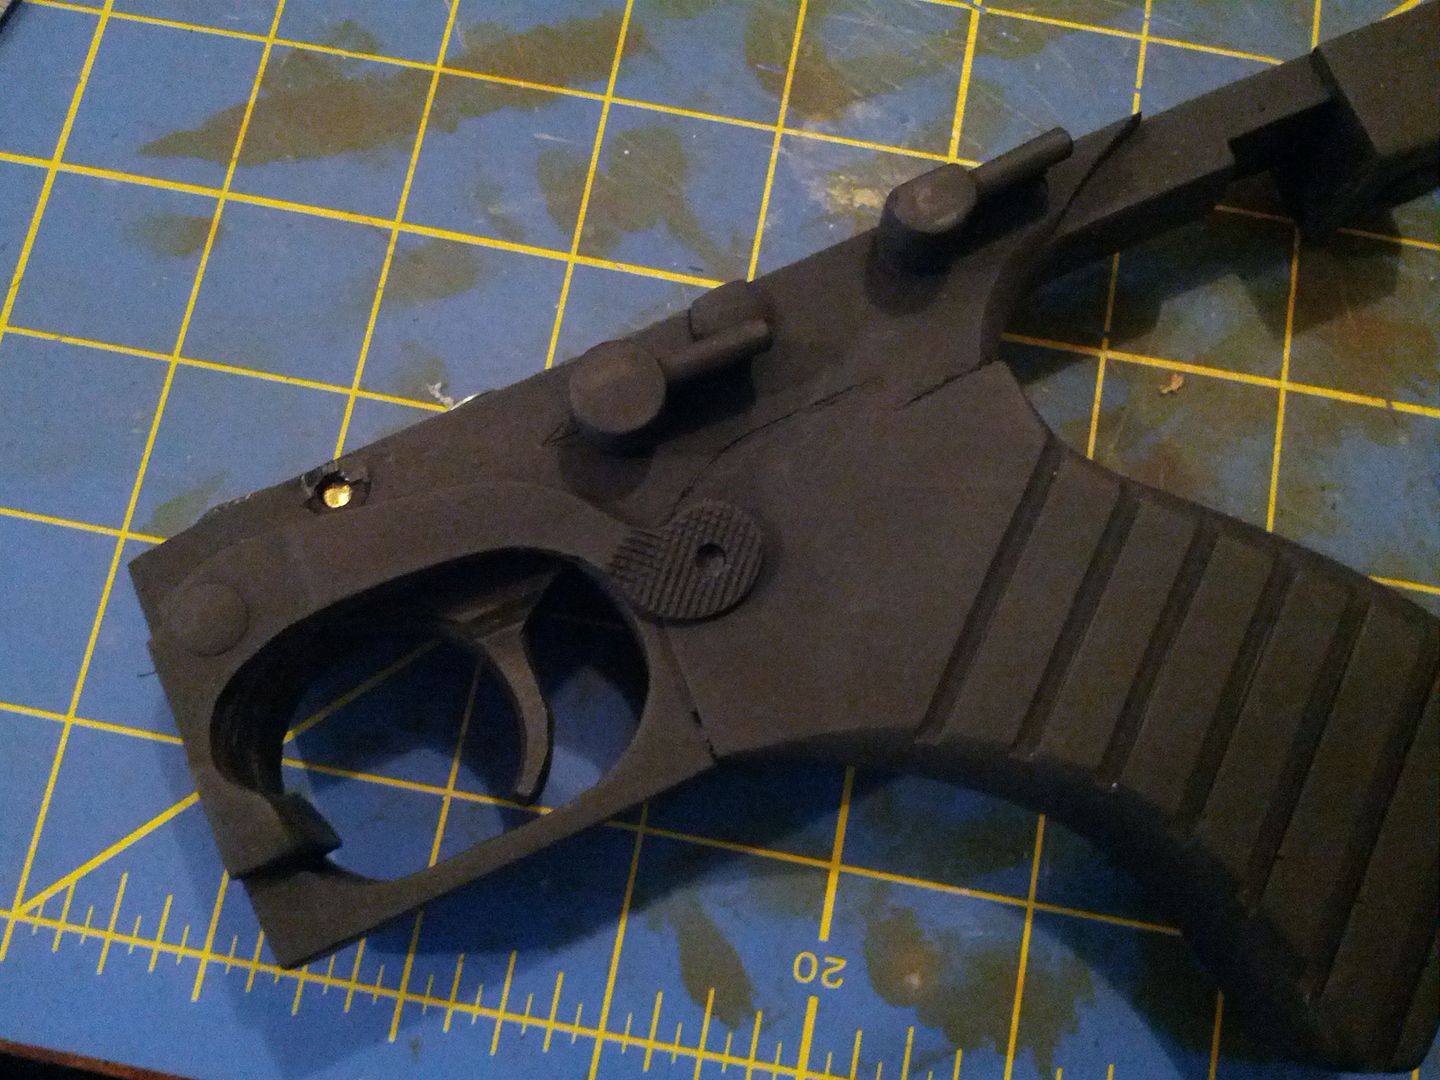
Now I could start assembling the pieces together. The receiver and mag well were glued together, then that assembly was glued to the shrouds. Next, the GL was glued, followed by the stock. The front and back mag well plates were the last pieces I glued on. For the magazine cap, I drilled and recessed magnets so I could take it on and off easily, since that is where the battery pack is kept for the LED.
No flash

With flash
I'll take some proper pictures in the next couple of days.
Here is everything all put together with the exception of the barrel/vent assembly*. For the picture, it is just sitting on top. I'm not too keen on having the assembly a solid piece, and I don't think drilling out the vents will be enough for me. I may end scratch building that part.
All I need to do is some minor seam clean up and puttying, then a little bit of sanding before I can paint! Should have everything all done next week :thumbsup